In this post I’m going to describe how to do a very basic no-frills Debian install that I quite often use for the basis or foundation of my other installs. Begining with a Net Install image (available from http://www.debian.org/CD/netinst/) I install the bare (ish) minimum without much fuss and little fluff.
Disclaimer:- This install should be considered a destructive process. If you follow these directions you will completely and irretrievably erase any data you have on the hard drive your select to install Debian onto. Do not come crying to me if you lost information from following this procedure. To be safe backup all data prior to starting (verify the backup ;O ) or install to a new hard drive.
Firstly download the above .ISO image for your preferred architecture (in my case i386, I would imagine the amd64 .ISOs will install fine with these instructions if you want 64 Bit Intel or AMD). Once you have the .ISO burn the image to a CD/DVD with your favorite buring software. Pop the CD into the drive of the machine you are going to install this on and boot from the CD.
From the first screen select the Install option highlighted and shortly you should be in the Debian text mode installer.
I believe most of the options are pretty self explanatory but we’ll take a run through each. Firstly you will be prompted with the default language to use for the installer.
Use the arrow keys to navigate up and down the list and press Enter on your desired language.
Next the installer prompts you for your Region/Locale. This information is used to set the timezone, and character maps for the install. Again navigate up and down with the arrows until you see your locale and then press Enter.
Next is the keyboard layout. For those in America/Australia an American English keyboard layout will get you going nicely.
If all is going well the installer will have picked up your network cards in the machine and will prompt you to select the primary network interface. This will be the one which is connected to the internet for the purpose of the install. If you intend to use a wireless connection I’d suggest installing with a wired network connection first then once things are running you can get wireless running later and not use the wired connection. In my case the network cable is connected to eth0.
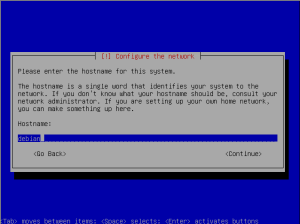
Next the installer will prompt you to enter the hostname or machine name. Enter the name you wish to call the machine without any suffixes of the name (mypc instead of mypc.mydomain.com).
The next screen prompts for the domain name you wish to use (e.g. mydomain.com). For a machine that is just for home use this is probably optional and you could leave it blank without any ill effects.
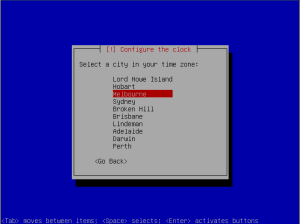
Next you are asked to select the nearest city which is in your timezone.
OK, now we get down to something a little more meatier. The partitioner allows you to prepare your hard disk for the install. As I mentioned previously this is destructive if you don’t want to overwrite what is on the disk stop now.
The easiest path is to select the Guided partioner. As you gain more experience it can be worth setting up paritions on the disk more to your liking. Linux is a little different than Windows in that it makes more sense to have multiple partitions assigned to specific purposes rather than one big drive like Windows tends to favour.
Next the partitioner will prompt to select the disk to partition. If you see more than one device hear double check you are going to partition the correct physical drive. In this case I have only the one drive setup on the virtual machine I am installing on.
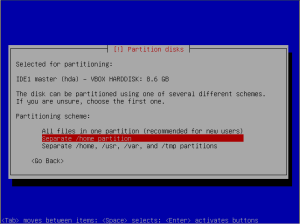
You could take the default option here to create one big partition for all files. My preference is to have a separate /home (think my documents) partition that I keep between installs and/or formats of the root / partition.
Have a good read of the next screen before you tell the partitioner that you are Finished and write the changes to the disk.
If you wished to manually size your partitions then allocate say 20-30GB for the root ( / ) partition. Up to twice your RAM for swap (those with larger amounts (> 512MB) of RAM could reduce this) and allocate the rest to /home for your files.
One more time we need to say yes to write the changes to the hard disk. Take note of the warning on the screen.
The installer will now begin installing the base system onto the hard drive.
Once the base system is installed we’re prompted for the password for the root user. Root is the big cheese on a *nix box. The super user or administrator that can do all things on the machine. Make sure you give it a good password and make sure you remember what it is.
You’re asked to confirm the password for the root user.
Next you are prompted to enter the full name for the user which you are about to create. Go ahead and enter your full name.
The installer takes a shot a guessing the user name you would like this user to log in with. Feel free to change it to something that suits your preference. This user is the one you will use to normally log into the system.
You are then prompted to enter a password for the user you are creating.
Of course you are asked to confirm the password to make sure you typed it correctly.
Now we are asked to configure the package manager (aka apt). Installing software in the Debian world is a little different that the windows way of trolling the web looking for an install. Debian maintains a software repository with 1,000’s of applications. These software repositories are mirrored across the globe and allow you to quickly and easily install a vast array of software.
The installer asks you to select a local mirror for the package manager. Any will do although some are probably faster than others.
Next you are prompted for a proxy server. For a home network it’s unlikely you have a local proxy server so you can leave this blank. In a corporate environment you may need help from the network administrator.
The installer now goes off and contacts the software repository to download a list of available software packages. A little more patience as we are almost there.
Next we’re asked if we want to participate in the package popularity survey. It’s anonymous and provides useful information over time of what software you use to the Debian development team. It’s entirely up to you and there is no penalty if you do do not participate.
Next we’re asked for some very high level options of the software to install.
For my minimal install I elect to unselect the “Standard System” option so as I don’t add a simple mail server or printing systems. If you want a normal desktop then feel free to leave “Standard System” & “Desktop environment” selected. Once you proceed pass this screen the installer will load the relevant software packages onto your system. For the minimal install this should not take long at all. If you elected to install a desktop system you may need to be a little patient as packages are downloaded and installed. We’re nearly done.
Next we’re asked to install Grub the boot loader. Grub’s job is to get loaded when the system boots (just after the BIOS) and then find the appropriate operating system(s) files to load. Note: this post does not cover dual booting with Windows and to be honest it’s been an eon since I’ve done it. I’d suggest some research before you do although I suspect the installer will work it out in a lot of cases but you may get into a state that you cannot boot into your Windows setup without further work.
And we are done. 😀 remove the CD from the drive and hit the prompt to reboot to your new system.
After information scrolls by the minimal install will prompt you to Login with your username and password.
So with the minimum install we have only used about 21Mb for the system. We now have a foundation system that we can task for all sorts of purposes. From lightweight to full featured desktops. Routers, mail servers, web servers, VoIP the options are nearly endless.
Filed under: Debian, Linux | Tagged: Debian, Linux, minimal install |


I followed your tutorial and my install takes 241 MB of space. How you managed toinstall it on 21MB?
Miss communication, I wasn’t referring to disk space I was referring to RAM. The goal was to install a Debian based system with a minimal RAM footprint rather than disk space then use that as a foundation for other projects. 241MB of space would not be surprising for this install. If you are looking for a really small usage of disk space then perhaps Tiny Core Linux, SliTaz or DSL may suit your needs. I go down the Debian path as that allows me to shape a system with all of the Debian packages available. That carries a cost but is much easier to build systems with greater functionality. It’s all about give and take and reaching the right balance.
Let me know how it ends up for you.
Regards
Tuxonomy
Hi thanks for reply, I also want debian as base :D. How do you check hom much ram is consumed?
i have 200 MB HD footprint.
Marko, the command “free” can provide you with memory usage. You can look up the man(ual) page $ man free or look here. The last image on the instructions shows the output from $ free -m to display the memory used in megabytes ( -m ). The first line shows out of 250MB the system is using 21MB and 229MB free (which Linux will aggressively use for buffers and cache).
HTH
Tuxonomy
apt-get install htop for memory use.